Styling Baby's First Birthday
If you are brave enough to take on this photoshoot be prepared for chaos! But the end result is perfection.
This little party came together with lots of love, planning, purchasing, and DIY-ing.

Originally I had talked to my friend about doing a combined birthday for our babies. Well, then Covid happened and it looked like I would just be planning Autumn's. That was so sad, but I started creating a mood board so that I could still make it special. And maybe in the back of my head I hoped we could still combine it since it was still far enough in the future that things could change.
Planning:

To begin the planning process I created a mood board. For details on how I created my mood board + links to each product check out my mood board post. I also included a few tips on how to create your own.
With a mood board settled I started purchasing items. I purchased most of the items that were straight from the mood board, but I'll share where and why I deviated on some items.
My first deviation was the lantern. I loved the lantern, but I was scouring the internet for the cheapest option that gave the same feeling.
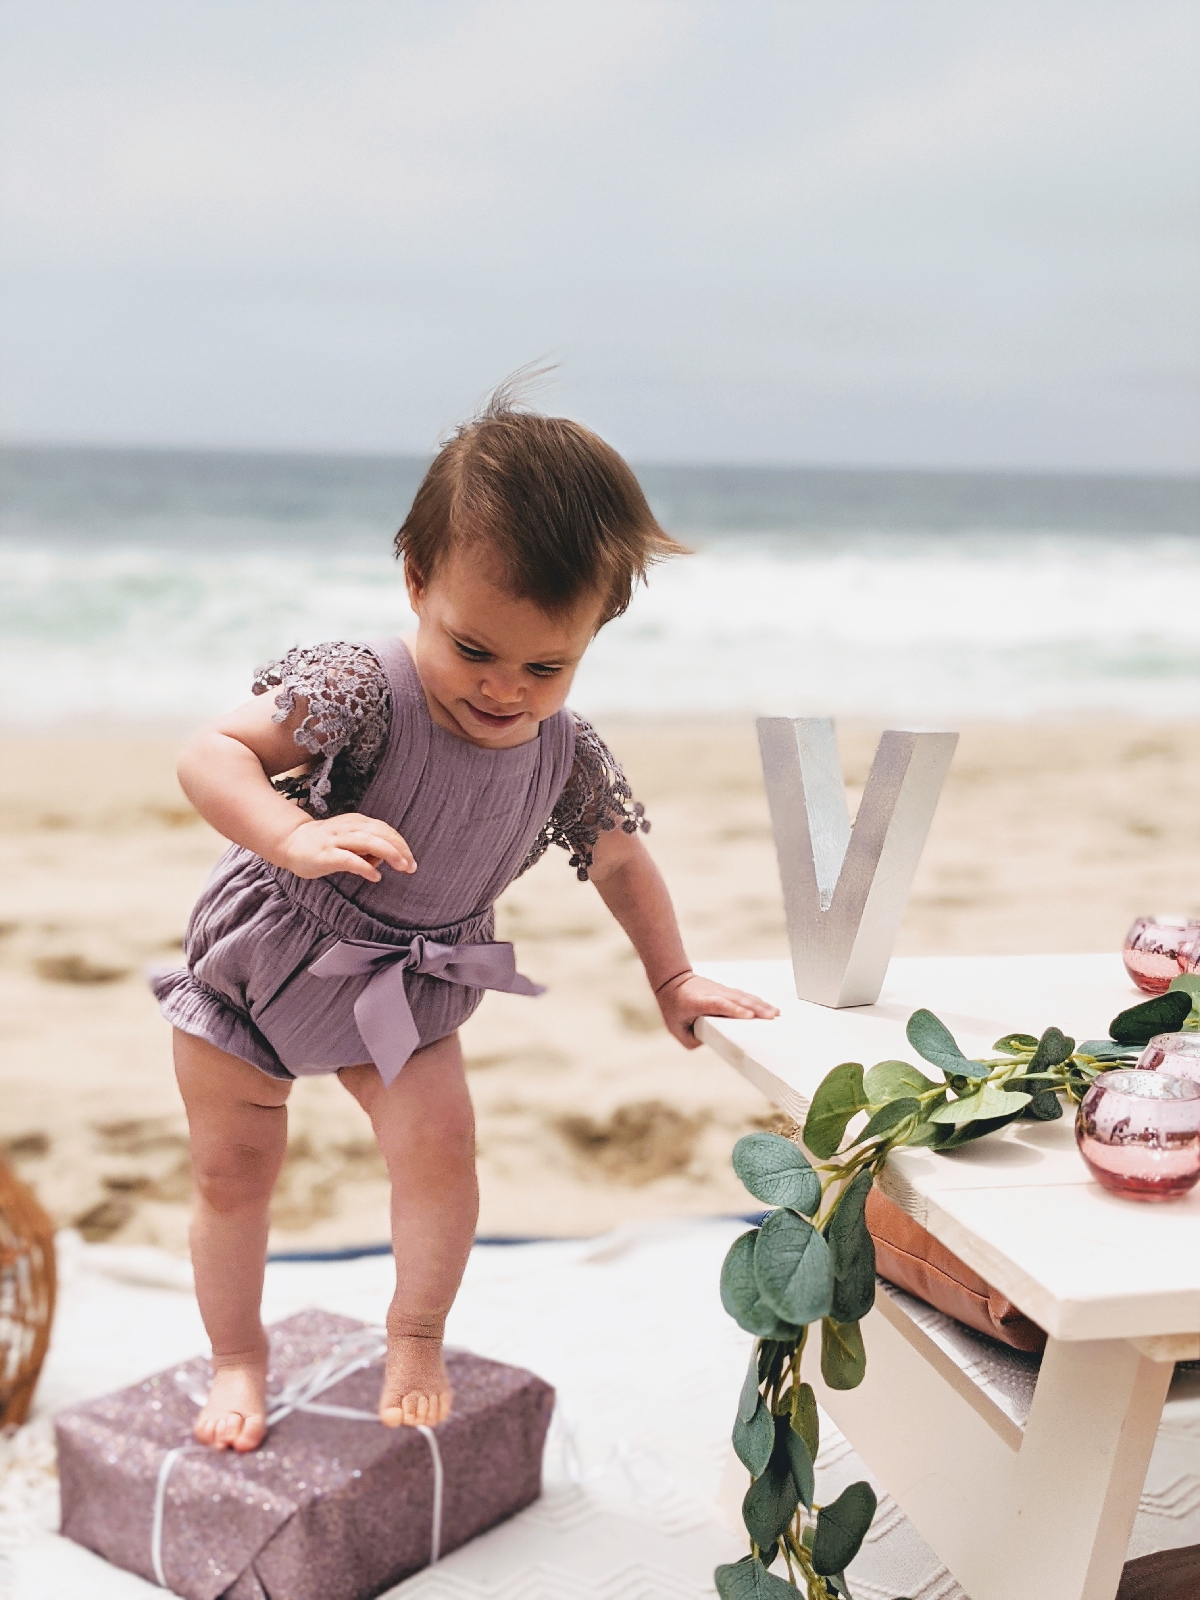
I was able to find these rattan lanterns at World Market. I got all 3 for less than I would have paid for the one lantern from Amazon. I chose to get staggering heights instead of lanterns all the same height in order to create impact. It also adds weight to the scene. You can see in the image below how the lantern detail combined with the table, centers Autumn and makes the photo look balanced. Maybe one day I'll get a chance to set up in the evening and actually light candles in them.

The table, I made, and you can find the full tutorial here.
I loved the banana fiber stools, but they were out of stock near me and they wouldn't ship in time so I had to do without, but honestly as much as I love the look I think it would have felt overcrowded so maybe it was for the best.
I bought this eucalyptus garland and removed the white flowers.
I eliminated sparklers because toddlers and fire is probably not a good idea plus we were partying in the middle of the day.
And the balloon was a constant back and forth that I finally just decided wasn't important. You can tell it's a birthday without it.
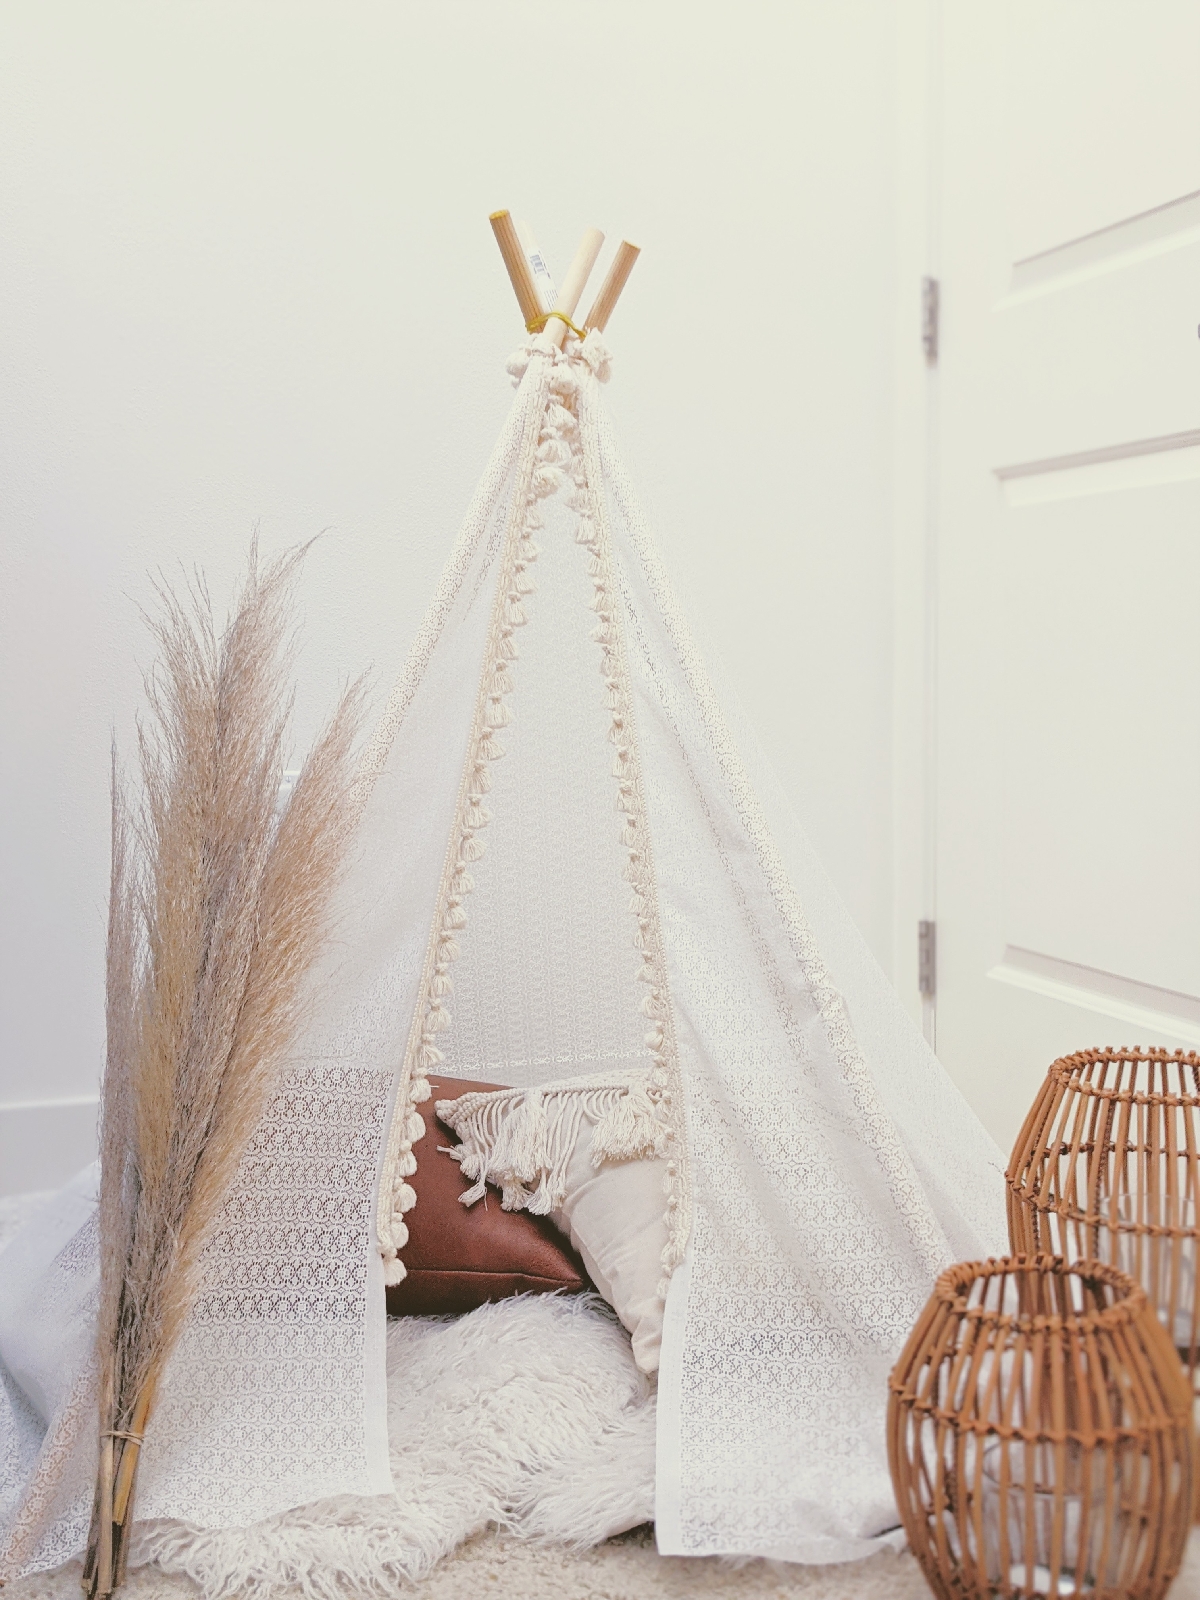
I added this throw blanket over a waterproof picnic blanket to finish the look. I loved the layered texture it added. The Teepee tent was another edition. I threw it together half hazardly at the beach. The wind proved difficult to work with, but you can find the teepee tent DIY tutorial here.
Good News/Bad News:
Things started opening up with covid and I kept wondering if there was a chance we could do the combined party. I found out that my friend would be moving right around the girls' birthdays. 🥺
At that point I decided to reach out and see if she felt comfortable getting together to celebrate. She said Yes! With a few adjustments it became a party for two.

My husband, David hacked a V for Violet out of some scrap wood we had lying around with a skill saw and reciprocating saw to match the A.

We also had to decide if we wanted to have two separate cakes or one that they would smash together.
We opted for a combined cake smash and I'm so glad that we did!
Cake Smash:


I loved seeing the two of them wrapped around the same cake. I envisioned them full on attacking and tearing it apart like they do with everything else. Reality, was a little underwhelming. The girls were uncharacteristically delicate. And left the cake alone for the most part.

The strawberries on the other hand were a big hit between the two of them.

I think by the time we got to the cake smash the girls were pretty exhausted from the drive, the wind, the sun, the posing, the sudden exposure to people after months of isolation, etc. There were even a few tears shed by this point.

Always a momma's girl, Autumn calmed down when I went to sit with her.
Location:
You must be wondering where this perfect secluded beach with beautiful blue water is located.

I mean it even has the perfect cliff backdrops.

This gem beach is Poplar Beach in Half Moon Bay, Ca. You should be warned though. This beach is not secluded. I think they missed a 'u' when naming it because this beach more fittingly is popular beach. There were so many people! Typically midday on a weekday I see a handful of people at the beach. That was not the case here. The parking lot was nearly full.

In order to give us the feeling of seclusion we had to walk a ways down the beach. I don't recommend doing that with a table, large baskets of decor, and two babies unless you absolutely must. It made for a few long trips down the stairs and across the beach, but it was worth it.
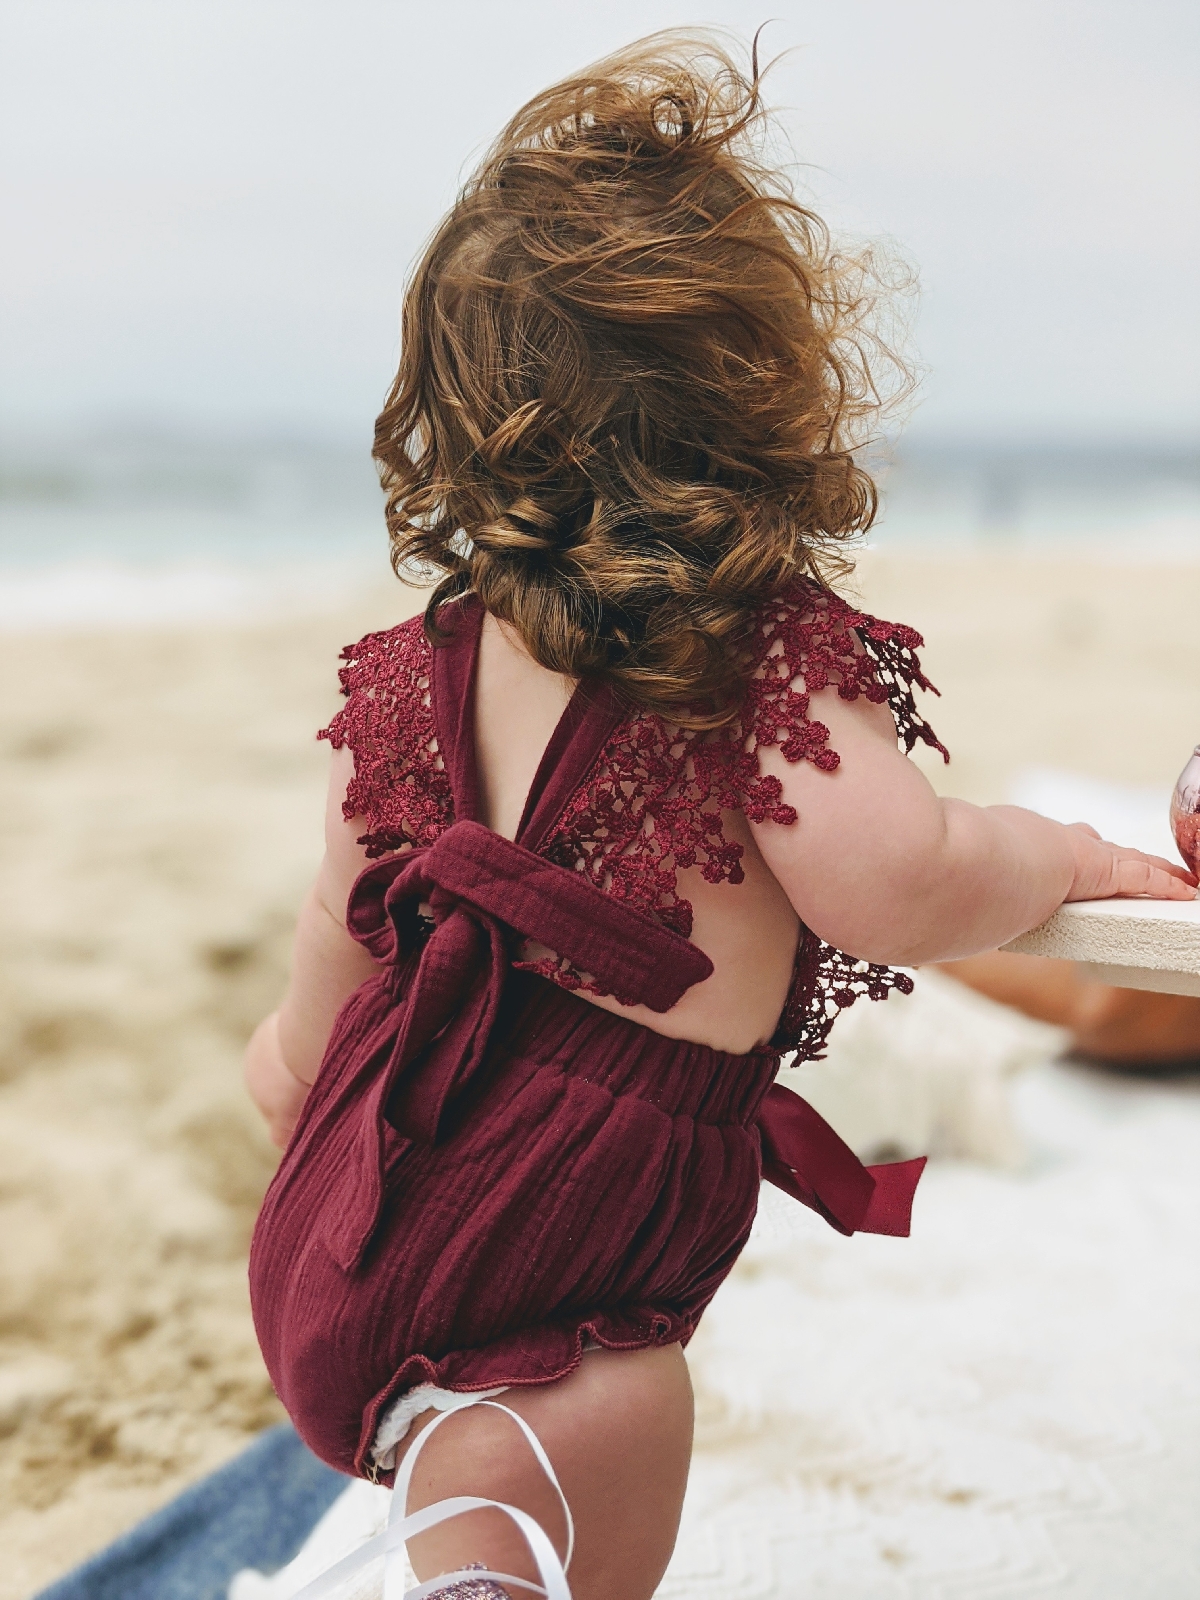
The outfit was a major inspiration for the whole scene. The lace detail gives those beach-y vibes.

My friend was able to get the same romper in a desaturated purple for her baby and it tied the whole look together! The morning of I tried making flower crowns, but holy cow the time passes quickly and they came out wonky. I did manage to do a leaf crown and it looked so good on Violet.

I don't know what to say about this photo other than that I love it.
Behind the scenes:

None of these images would have been possible without the amazing dad team. In between the photos they held the girls and kept them happy. Then when we were ready they set them down and rushed away to get out of the shot.

They were also fixing wardrobe malfunctions, dusting off sand, and giving food as needed.

Half of my pictures had a dad arm poking in. They really showed up in a big way and made the whole thing possible.
Editing:

I think we all love to see a good before and after. The moment was dreamy, but pictures never show 100% of the feeling that was there. I edit each image to bring back some of the magic into the moment. If you want to recreate the look I'm sharing a few things that I do to go from the top picture to the bottom picture completely edited on my phone.

I use the Google Pixel 4 which has an awesome camera for a phone. Typically I edit each individual picture, but since I took over 300 pictures and had well over 50 that I liked I decided to use a preset and make minor adjustments. The presets I used were West and Blush which are already installed on the camera app. Next I typically added in a little more light. Sometimes by increasing the exposure and other times by increasing the brightness of the whites. Often when I increase the whiteness or exposure I decrease the highlights. Doing that helps to take the unwanted shine off of faces.

I also like to add in the slightest tint and warmth. When faces are in the picture I decrease the skin tone. I play with these adjustments until I have an image I like. Often when I've added in whites or exposure colors fade. To bring color back into the ocean I added Blue into the picture.


Here are screenshots of the exact adjustments I made for this photo. I'm just an amateur, but these are little tricks I've learned through trial and error to make my photos look better.

Favorites:


This comment has been removed by the author.
ReplyDeleteOkay this is AMAZING! I love that you broke down all the details, especially of how you edit the photos! All the pictures you did turned out SO WELL. I am beyond happy that me and V could do this with you! Thank you for designing such an incredible shoot and letting us be a part of it!
ReplyDelete